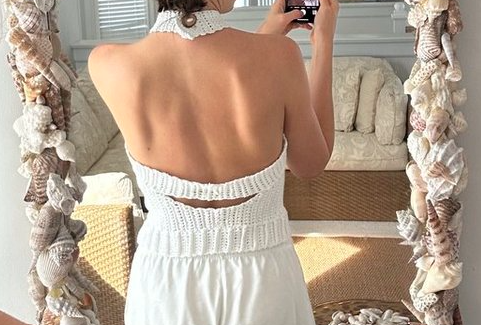
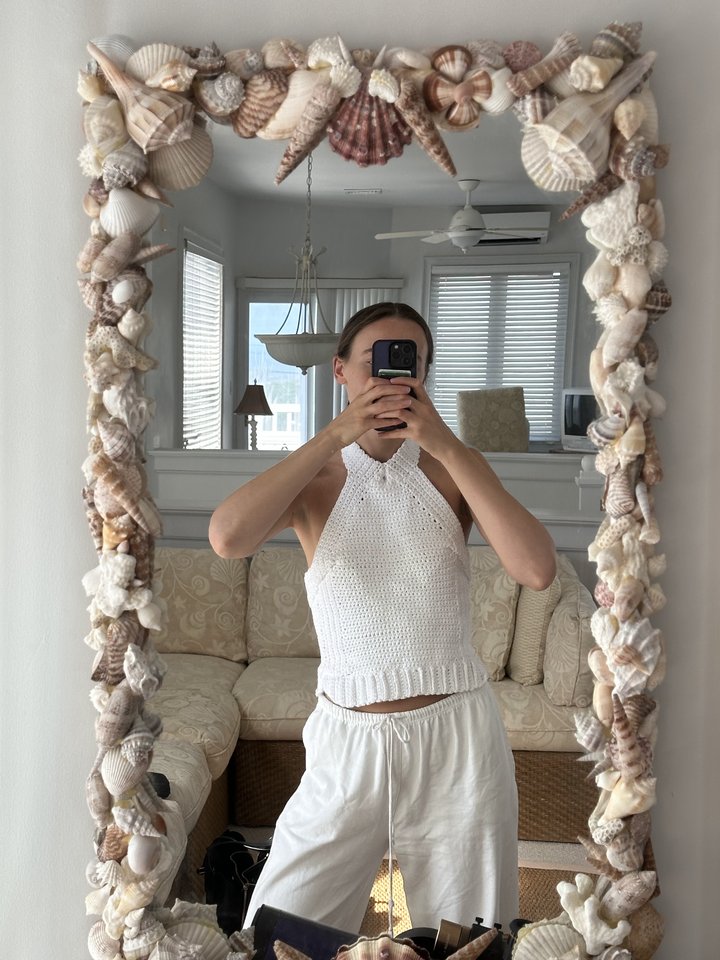
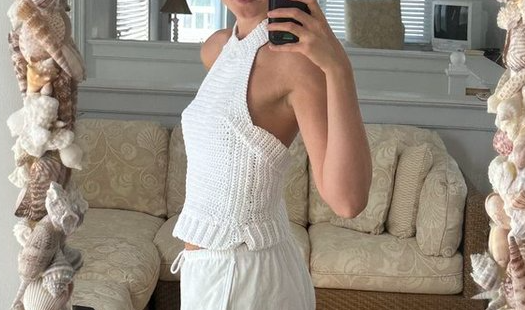
There’s something really satisfying about making something with your hands—especially when you end up with a piece you’re excited to wear out. I love crafting because it gives me a sense of accomplishment, and lately, I’ve been drawn to projects that feel both creative and practical. This crochet top checks both boxes: it’s simple to make, flattering, and totally customizable. Whether you’re heading out to lunch with friends or just want to elevate your everyday outfit, this top is a great project to try.
Below are the step-by-step instructions I followed to create this piece. Feel free to adjust the shape, size, or style to fit your own vision.
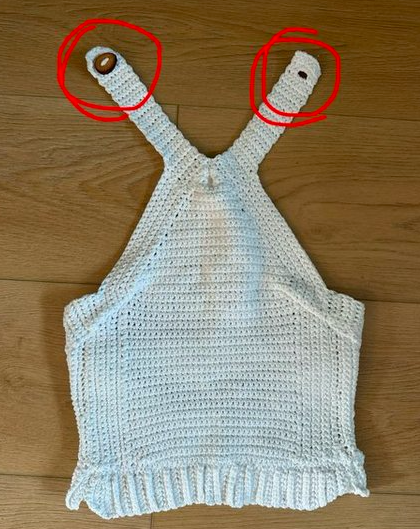
Note: I carved by own button out of an avocado seed. See my post on avocado seed whittling to find out how.
*****THIS IS MY FIRST ATTEMPT AT THIS TOP–a prototype of sorts–I PLAN TO TAKE MORE DETAILED NOTES AND RELEASE A PATTERN SOON******
Materials:
- Medium-weight yarn (cotton works great for wearables)
- Crochet hook suited to your yarn (I used a 4.5 mm)
- Scissors
- Tapestry needle
- Stitch markers (optional)
- Bobby pins or safety pins (for testing fit)
- Button or hook & eye (optional for closure)
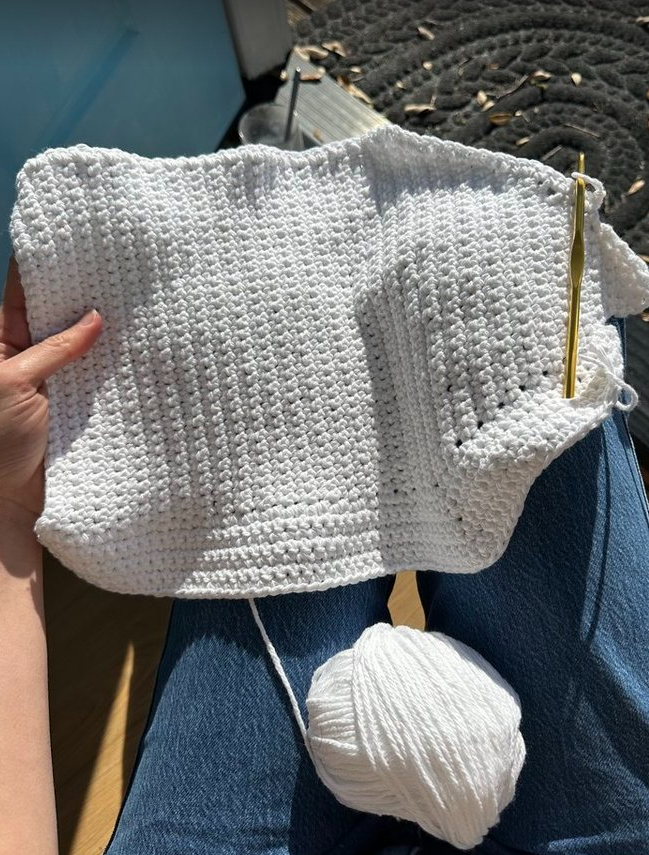
Step 1: Create the Front Panel
- Foundation: Start by crocheting a chain that is 8 stitches across. This is the top center of the shirt (the neckline).
- Shaping the Chest: On every other row, increase one stitch at both the leftmost and rightmost ends. This creates a gentle triangular expansion from the neckline down to the widest part of your chest.
- Stop Increasing: Once the width matches your chest at its fullest point, stop increasing and continue crocheting straight rows downward to reach your waistline.
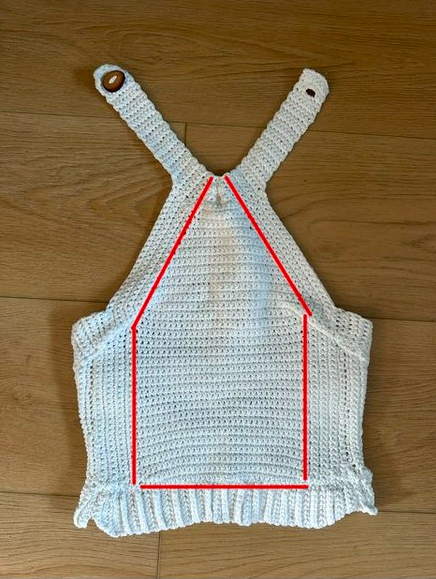

Step 2: Add Vertical Borders to the Front Panel
- Crochet Vertically: Starting at the bottom edge of the front panel, crochet up along the left side (side edge, not bottom), leaving about 1 inch of space at the top.
- Turn & Repeat: Once you reach that 1-inch mark, turn and crochet back down to the base. Repeat this back-and-forth motion until you’ve built about 1 inch of vertical border fabric.
- Do the Same on the Right Side.
This creates a subtle frame that adds both visual interest and structure to the front panel.

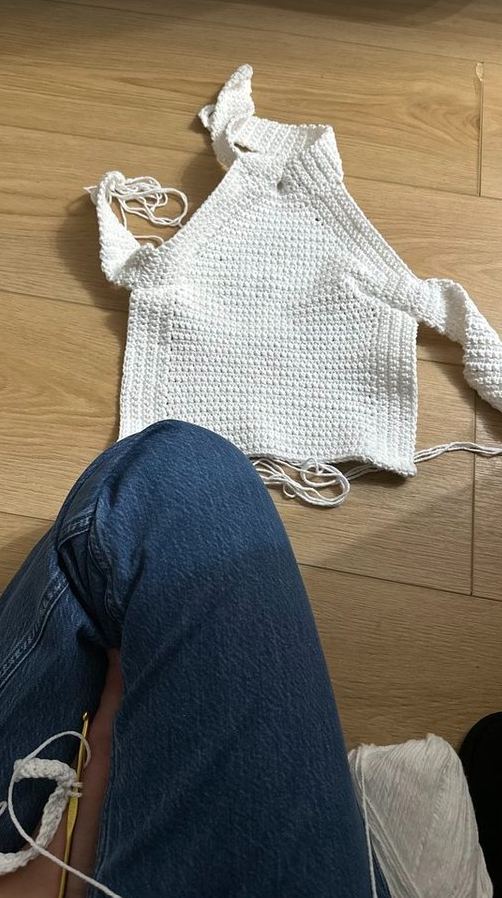
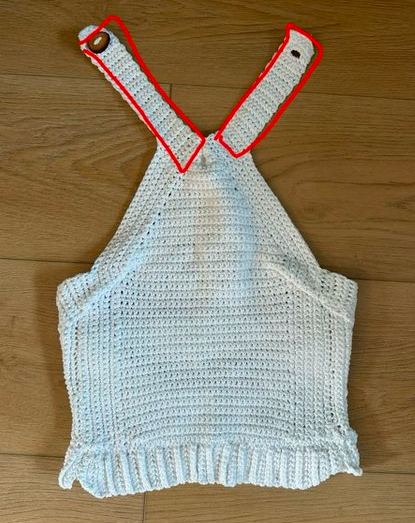
Step 3: Make and Attach Neck Straps
- Crochet Two Straps: These should be around 2 inches wide and long enough to connect comfortably around the back of your neck.
- Attach: Sew each strap to the top corners of the front panel (within the 1-inch space you left earlier).
- Fit Check: Before securing together, pin the straps behind your neck and make sure the shirt lays nicely across your chest and shoulders.
- Add a Closure: You’ll need to add a closure where the two neck straps meet at the back. This helps the shirt stay secure and makes it easy to take on and off.
- Choose Your Style: Use a small button, snap, or hook & eye—whatever suits your look and comfort level. The type is up to you, but some closure is essential for function and fit.

Step 4: Optional Pinching for Fit
These small adjustments give the top a more fitted and polished look:
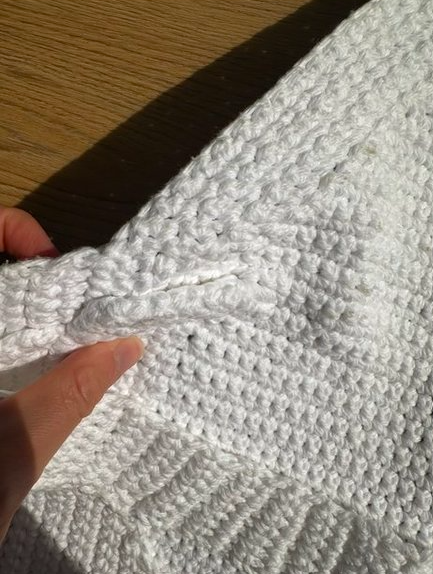
- Neckline Pinch: At the very top of the front panel, pinch the center just slightly and sew a small tack stitch to gather the fabric a little. This softens the neckline.
- Underbust Dart: Fold a bit of fabric upward from just under the bust and tack it in place. This creates a natural dart for a more shaped fit.
Both of these are optional—try the panel on and see what works best for your body.
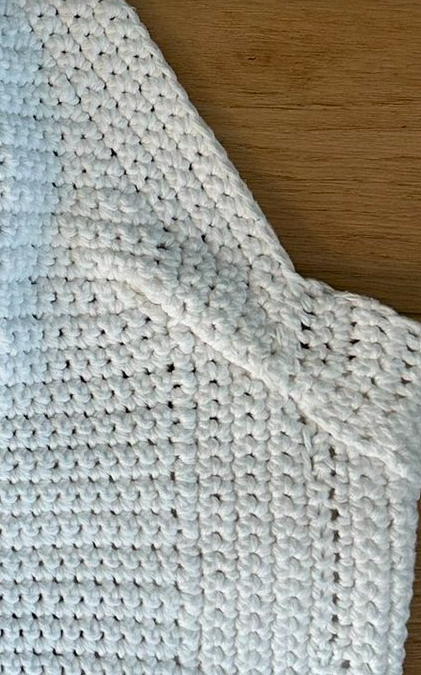
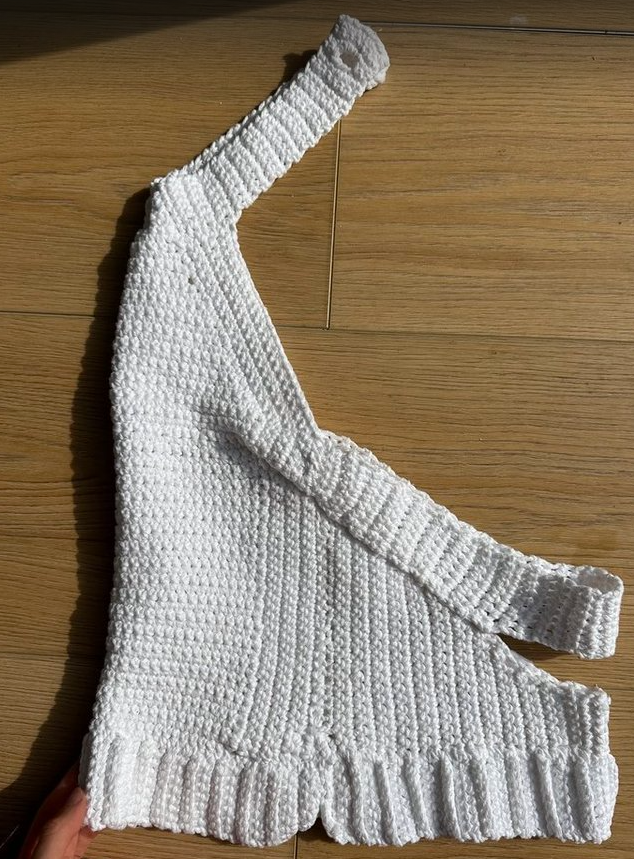
inner view
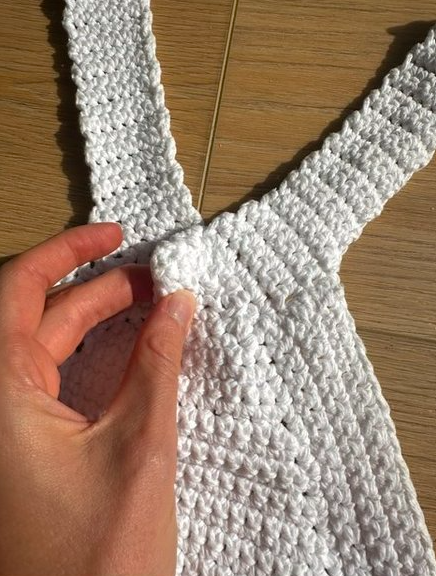
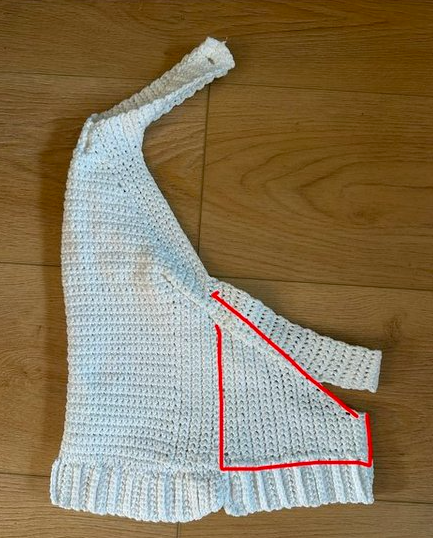
Step 5: Create the Upper Back Strap
- Split Strap Method: Crochet two halves of what will become your upper back strap. Attach each half to the left and right corners of your front panel.
- Fit Before Final Join: Wrap both straps around to your back and pin them together. Once you’ve found the perfect fit, either sew them together or attach with a button or hook & eye.
- Tip: A button closure makes it easier to get the top on and off.
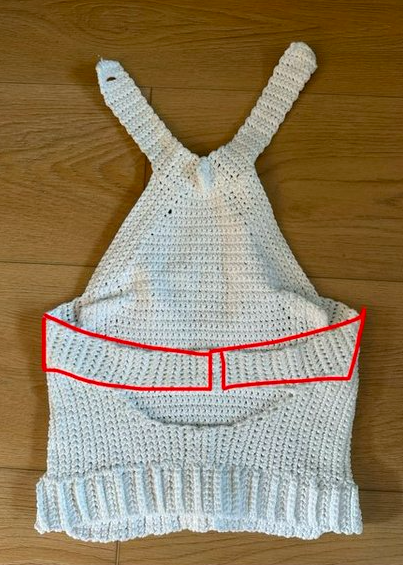
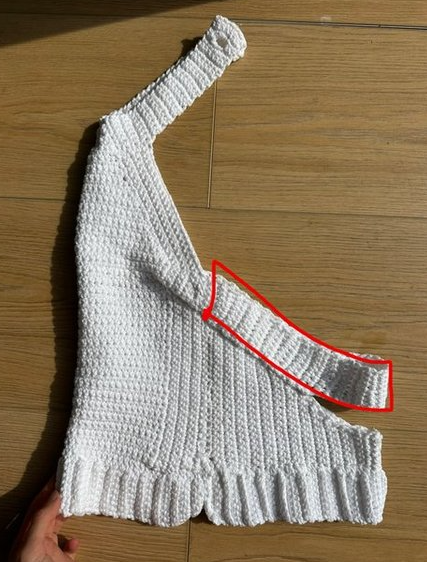
Step 6: Add Optional Bottom Strap(s)
If you want a cleaner, more tailored look, add a lower back strap:
- Chain Base: Crochet a chain from the bottom side of the front panel to reach under your arm.
- Shape the Strap: Work rows along the chain, decreasing on the side that will sit in your underarm. Stop decreasing when the width of the strap is around 1 inch.
- Repeat for the Other Side: As before, create two strap halves and test the fit before joining them together in the back.
- Final Fit Adjustment (Optional): For a snugger look, you can sew a small part of the left and right edges of the upper and lower back straps together.
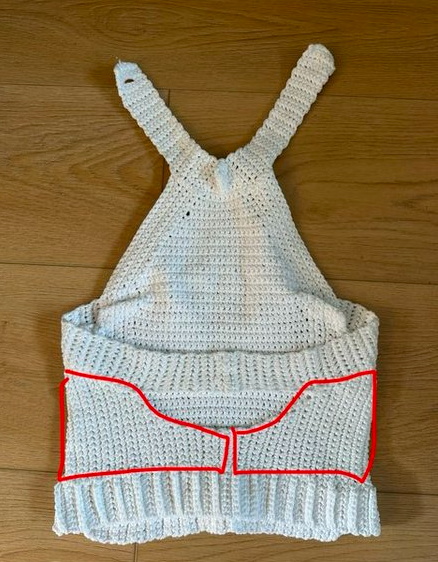

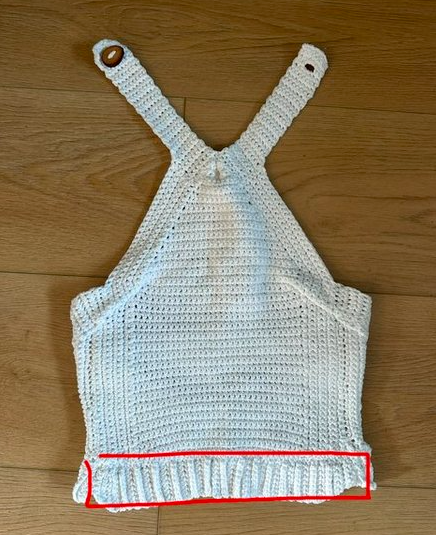
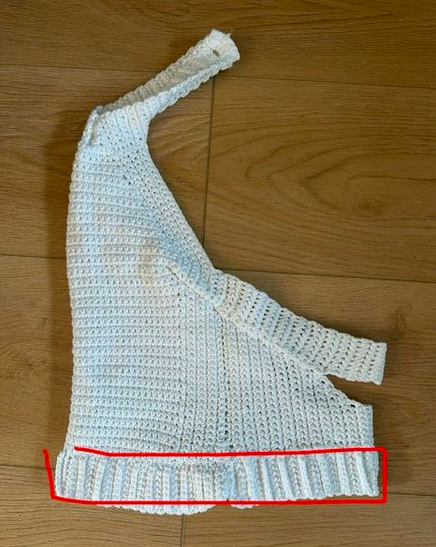
Step 7: Optional Bottom Border
Want a little more length or polish at the bottom? Crochet a border directly onto the bottom of your front panel. This adds a bit of coverage and makes the shirt feel more finished. I made mine ribbed but this also is optional!

Final Touch: Add a Closure
For added security, especially at the neckline or upper back strap, sew on a small button, snap, or hook & eye. This is especially helpful if your top is snug or has less stretch. I carved by own button out of an avocado seed. See my post on avocado seed whittling to find out how.

Style Notes:
- This top can be styled up or down—pair it with high-waisted jeans or a flowing skirt.
- Without the bottom strap, the top has a flirtier, more open look. With both straps and a bottom border, it leans more classic and elegant.
- Try experimenting with different yarn textures or adding decorative stitches to the borders for a personalized twist.
Final Thoughts:
This was one of my favorite pieces to make recently—not only because it turned out exactly how I wanted, but because I actually wear it. It feels amazing to make something cute, wearable, and unique. I plan to wear this out next time I grab dinner with friends, and I already have ideas for color variations and design tweaks.
Crafting doesn’t always have to be for decoration or gifts—sometimes it can just be about making something lovely for yourself. I hope this tutorial gives you a little inspiration to start stitching and see where your creativity takes you.